Add multiple Excel/CSV to ArcGIS Online as a feature service with different layers

I discussed the steps to add a single CSV file as a hosted feature service in an earlier article link, but when I tried to add multiple PDF files, I was unable to do so. Therefore, in this article, I will mention how to upload multiple files combined in one service as different layers.
To follow this article, you will need either ArcMap or ArcGIS Pro because the CSV files will first be converted into features, and then they will be either added to a Geodatabase or Shapefiles.
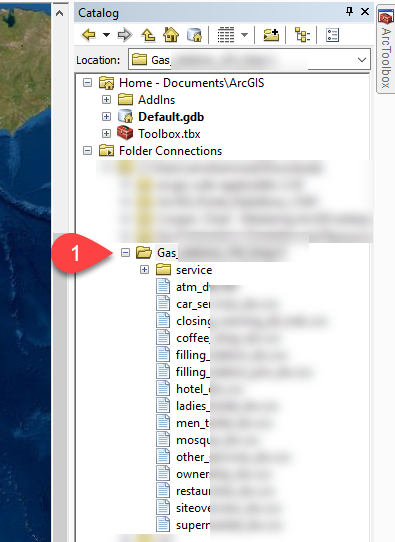
To begin with, let see our CSV files in the ArcCatalog pane of ArcMap (Step 1).
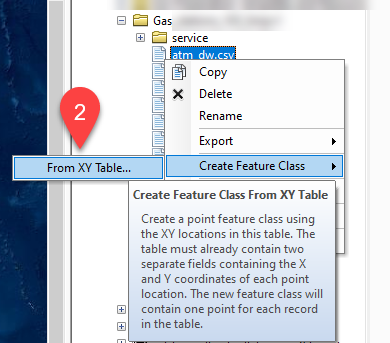
Then select the file you want to convert to a feature layer. Go to the submenu 'Creat Feature Class' and select 'From XY Table...' (Step 2).
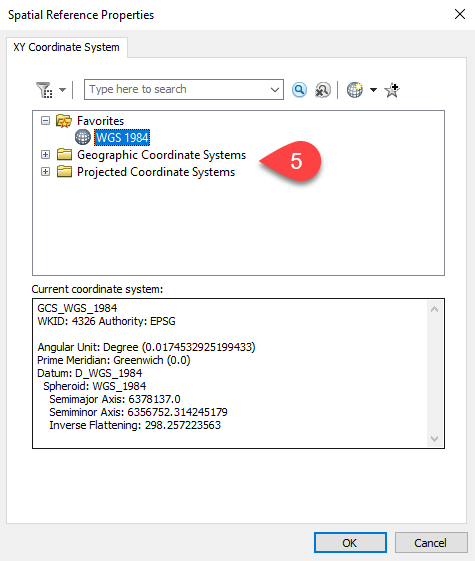
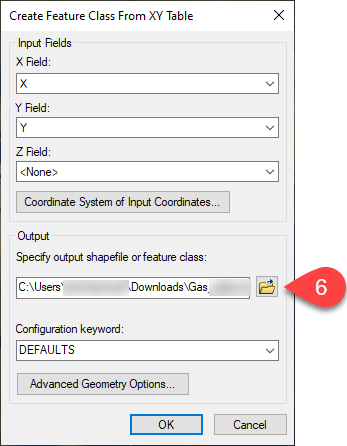
A new window, 'Create Feature Class From XY Table,' will open. First, select the corresponding coordinate from the CSV file in the X and Y fields dropdown menu in this window (Step 3). Then select the Coordinate System that is suitable to the coordinates in your file (Step 4).
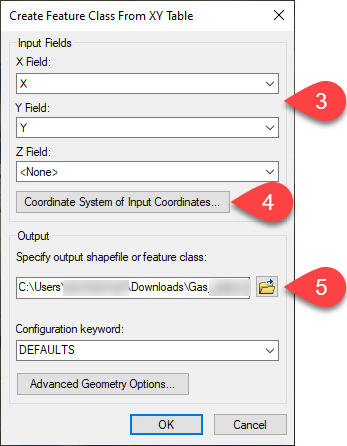
For our data, we have selected WGS 1984 (Step 5). Then press OK.
Select a suitable location for your feature class to store (Step 6).
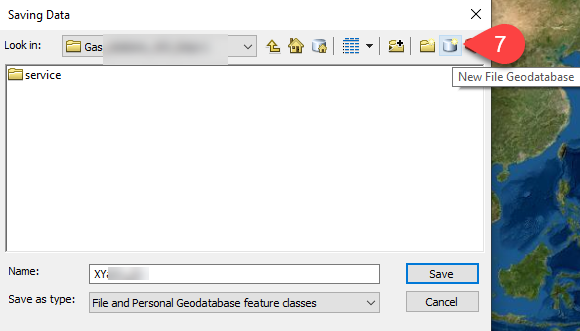
Create a file geodatabase (GDB) a store your feature classes in that GDB (Step 7), and then press OK.
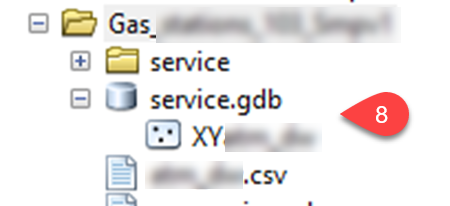
This process will convert your CSV to a feature class. Now, head back to the ArcCatalog pane and refresh the folder. You'll be able to see the newly created file in the previously selected GDB (Step 8).
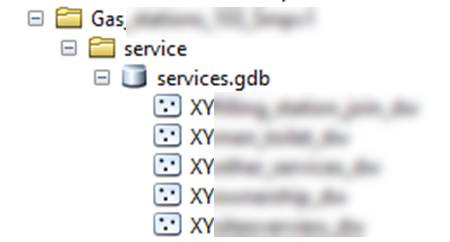
Similarly, you can add more files to the same GBD
In your File Explorer, you'll be able to see the .gdb folder. Create a .zip file from the folder (Step 9)

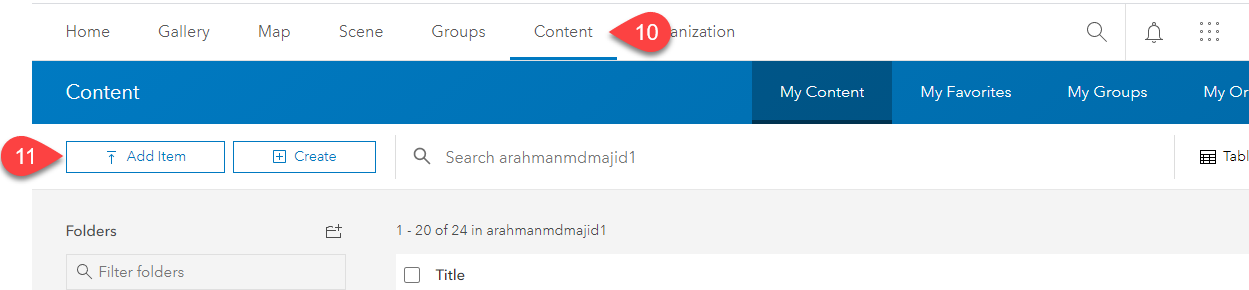
As discussed in the previous section, we will follow the same steps to upload the file as illustrated below. Well navigate to the Content menu (Step 10) and select Add Item option (Step 11)
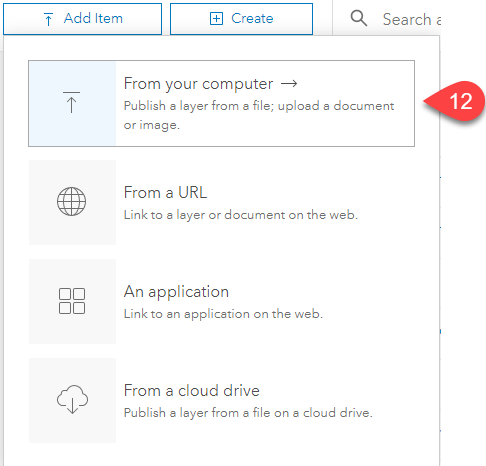
We will select the option to upload the file from our computer (Step 12)
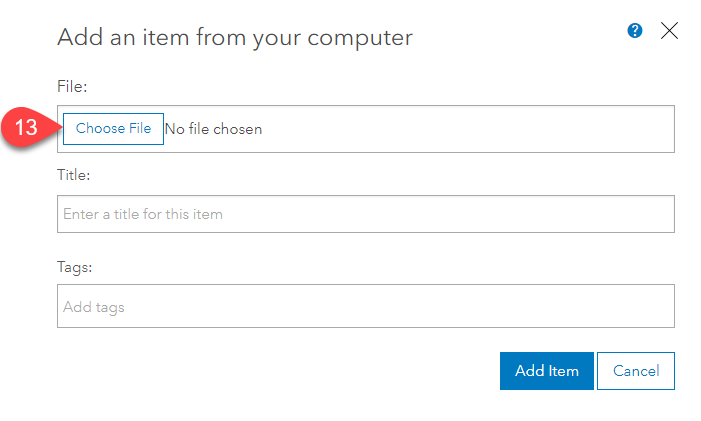
Then we'll navigate to the file located in our machine (Step 13)
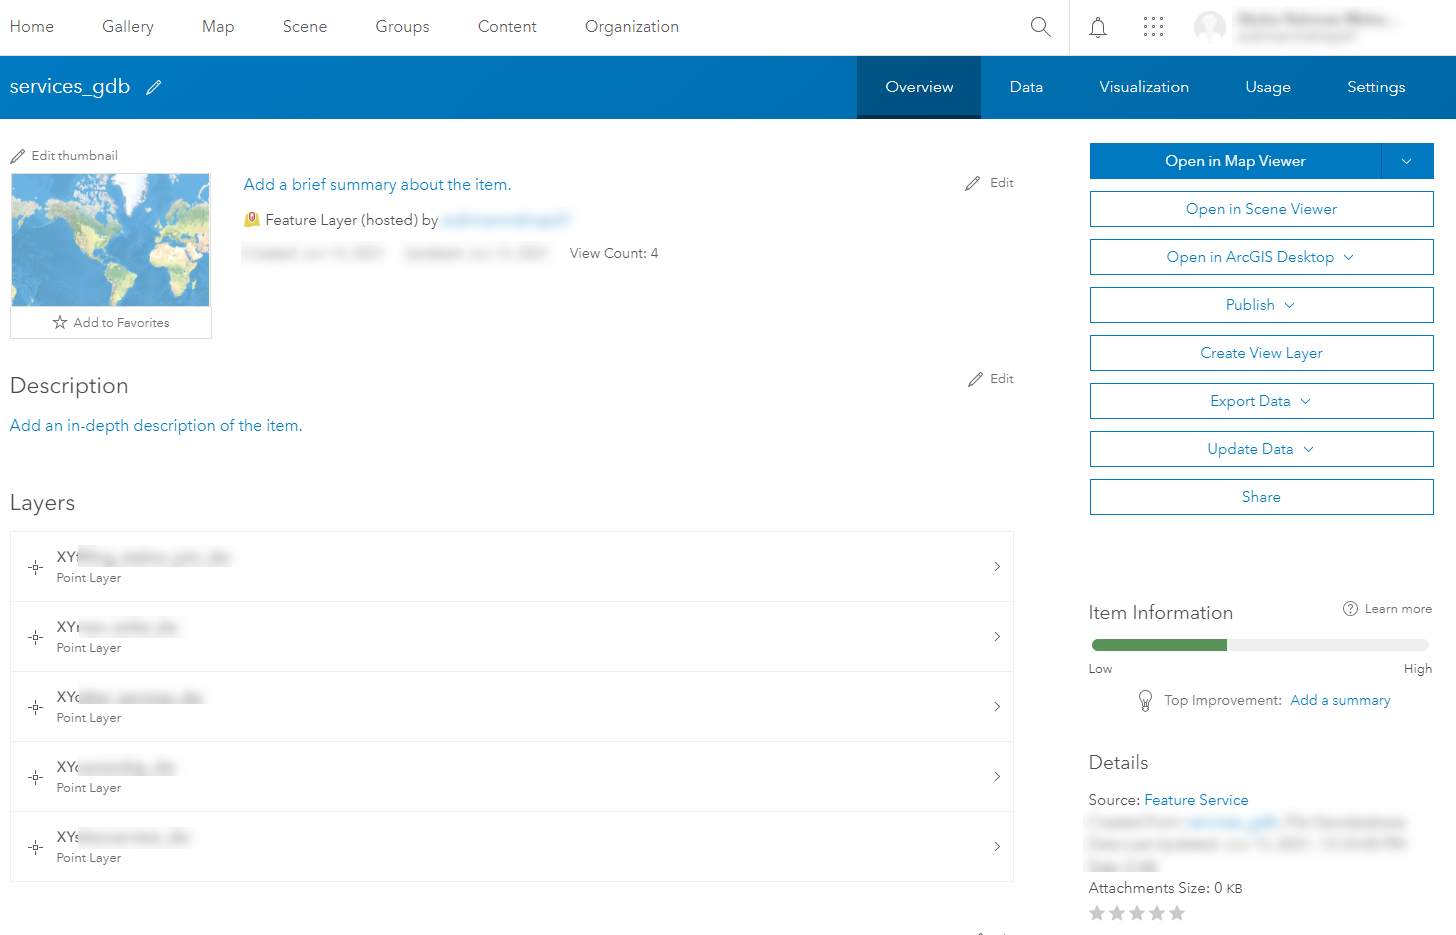
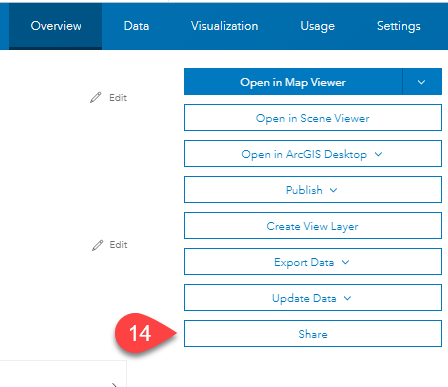
After uploading the file, you will able to see the following page.
On this page, we will share this service with everyone to be accessible by the public (Step 14).
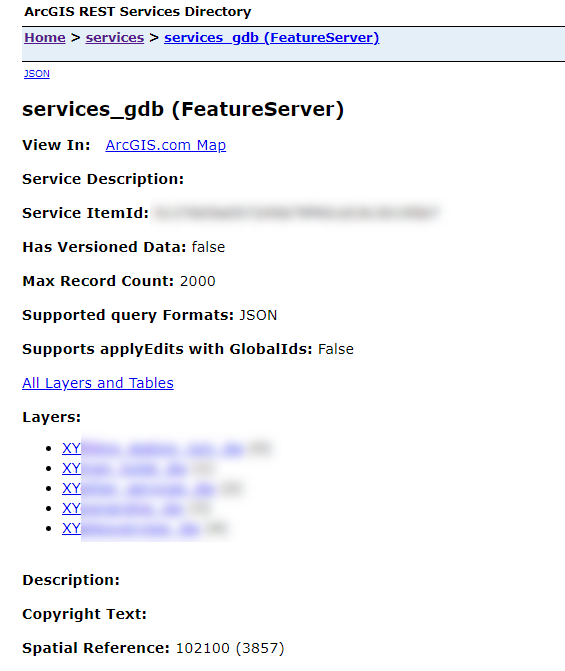
With this, you can copy the service link from the bottom right corner of the screen and open it in a new window.
This concludes our article on adding multiple excel files and utilizing them as published services with many ESRI products and applications. Most prominently, it can be utilized by your custom web and mobile mapping applications.
